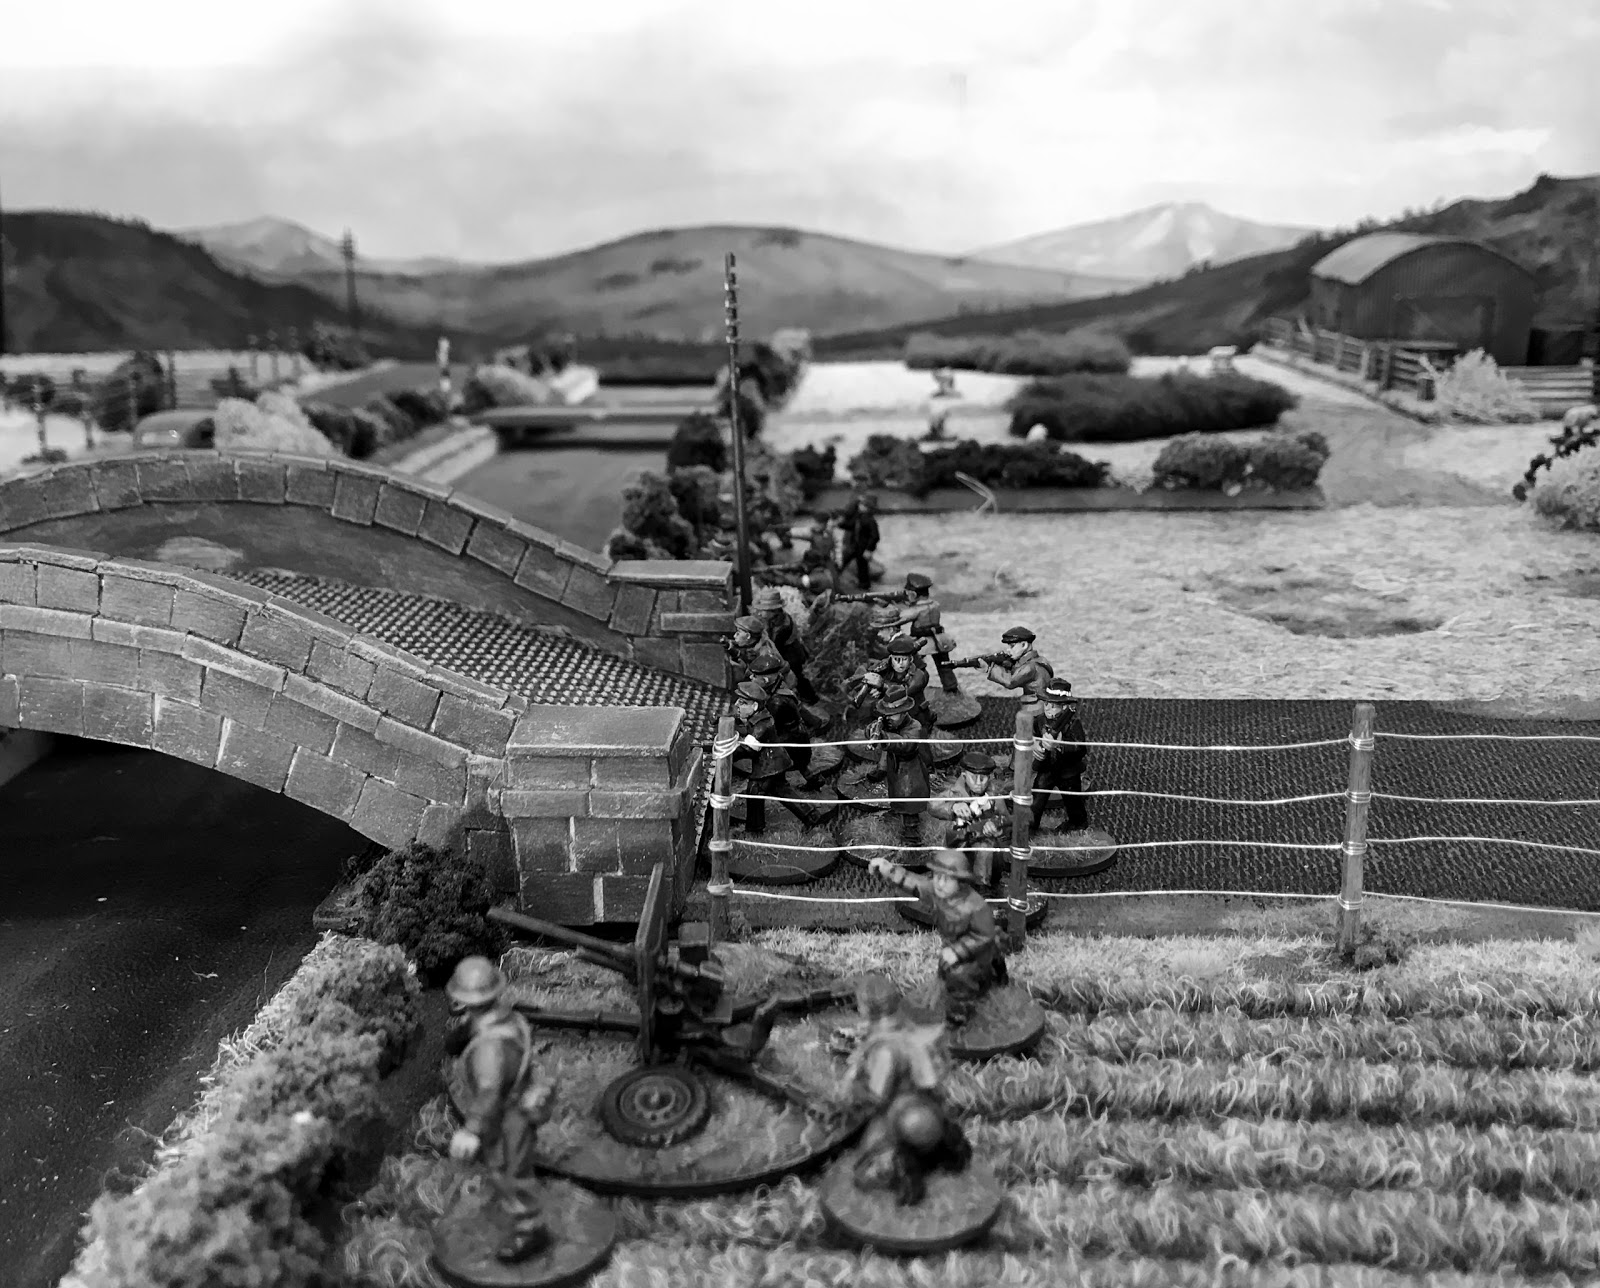
The only British gun in the area has been brought up to protect the bridge, two platoons of the Home guard have dug in but nobody is sure what to expect, the noise from the beach is terrible

Some german infantry have already made it across the canal by footbridges and are ready to attack the main bridge from the rear

Jack boots can be heard running down the road from Dymchurch

Infantry are supported by Gebirgsjager to help assault the bridge

The infantry over the canal are given the signal to advance !

Reinforcements start to arrive down the railway infantry and some improvised artillery

An overview of the canal.....

A random event causes one of the Home Guard platoons to flee .........an ominous sign at this early stage for the British the defenders also come under sniper fire

A unit of Kent’s finest boys in blue are despatched to flush out the sniper team

The Germans use this moment to press their advantage and charge down the road towards the bridge the defenders are heavily outnumbered...

...and then the first German armour is brought up from the town

They have also managed to pull up a PAK 36 to deal with any British armour

British infantry arriving down the railway start to fire at the advancing Germans to slow them down

But what is this the first unit of German infantry have chosen to run (blunder !)

The commanding german Officer crosses his arms in disgust, but the Gebirgsjager are still charging down the road covered by the 222

Finally some hope for the British with the arrival of a Vickers Tank and more Home Guard Infantry who have been ordered to hold the bridge at all costs

The PAK 36 starts to fire at the bridge defenders whilst a single Kradschutzen pins down the remaining police constables

From bad to worse the Vickers takes a direct hit and explodes and the bus takes a stray bullet and also explodes killing one of the Home guard

The infantry are continuing to advance although they are coming under flanking fire from the railway

The Panzer 1 finally pushes through to the canal to support the attack

With limited targets the 36 now targets the bridge defenders

Things are looking bad for the British now Germans are closing on the bridge, one of the remaining infantry units attempts to cut them off

The final order is given to the Gebirgsjager to capture the bridge..........the Home guard prepare to flee

The Pz1 tests the strength of the small footbridge

....and the Kradschutzen now charges over the bridge, the Home guard have just enough left in them to knock it out

.......But then the unthinkable elite Gebirgsjager having been ordered to charge the bridge blunder

and flee .........😀😀😀

But it may be too late for the Home guard at the bridge

Two units of Germans have now chosen to run

But at the bridge the Germans have finished off the Home guard and the remaining Somerset’s choose to pull back

The Germans have now cut the road behind the canal and the unfortunate British lieutenant is forced to surrender, for him the war is over ......
Another close battle, technically it was a draw but the Germans had the advantage at the end and having cut the road we gave them the win.
Another splendid report and pics, not such a splendid result. Can the fascist invaders be stopped I wonder.
ReplyDeleteI was thinking about this over Christmas and realised we are still on day one ! My objective is now to bring day one to a close somehow then the British can start to counterattack...it will be a long time before the Germans are in the midlands!
DeleteA tragic loss for the British, I hope they can rally and drive back the Hun! Great report once again Matt :-)
ReplyDeleteThanks for watching. I fear the Germans will be advancing a goos while yet before the British can stabilise the front line or consider victory ! 🙂
DeleteA marvellous battle report on sumptuous terrain. A few years ago, in the village in which Iused to live, there was a history morning devoted to WWII at the primary school. They had on display a deployment plan for the Home Guard section should they have needed to interdict the main road by ambushing the Germans. I don’t think they would have lasted very long.
ReplyDeleteThanks Steve....in our games they are certainly plucky but their inexperience and poor weapons mean they are quite naturally outclassed...☹️
DeleteFantastic report again :)
ReplyDeleteMasterclass photos as always Matt! A wonderful and immersive report, so inspiring!
ReplyDeleteYou are very (too) kind but thanks for your support Phil 😀
DeleteGreat battle report
ReplyDeleteThanks Mike 😀
DeleteAs Winston might have asked,”Why can none of our Generals fight?” As ever a grand looking game with the wrong outcome. It’s about time the vile Hun were hurled back into the sea!
ReplyDeleteDavid see my comment above we are only on day one at the moment, the British haven’t been able to react or pull any significant reaction together yet.......I fear my campaign structure may be somewhat biased against the Home team as I was looking forward to some scenarios a very long way in the future.
DeleteOnce more, a stunning looking game, Matt! Great photography!
ReplyDeleteThanks Jonathan ......all my photos are now taken with my phone ! I superficially/ quickly edit them on my iPad then upload. The secret if there is one is to take quite a few and try and get them up close 😀
DeleteScorched earth policy. Write off the South as lost and pull everything back to the Riding's of Yorkshire and the lakes of Cumberland. We'd be all right, so that's all that matters really :)
ReplyDeleteWhen will Detective Chief Superintendent Foyle and his plucky driver make an appearance? I'm sure I've seen the figures on your tables before.
Now there is an idea but I would miss some interesting scenario options that have sat in my head for a while🤔
DeleteOh, the game looks good, by the way. Forgot to mention that before :(
DeleteI'm beginning to wonder why the British forces aren't putting up more resistance. Can the German invaders really get so much ashore using those converted and unseaworthy Rhine barges?
ReplyDeleteEarly days yet, but the Brits have always been complacent!🙂
Deletea fine read , a great eye candy ... the poor Brits come off worse again!
ReplyDeleteThanks Dave ....go the Germans I say well at least until they have captured the whole of the SE 😀
DeleteAnother great report Matt, tough luck on the Brits...
ReplyDeleteThanks Stu...technically it was a draw but it felt like a german victory.. and they can now push onto Ashford 😀
DeleteHey Matt great looking game and excellent AAR.
ReplyDeleteYour developing collection of figure, vehicles and terrain is also.
Thanks for posting this!
Thanks the collection is increasing but I do think it will start to slow down soon........but then I do need some later 1943 onwards kit 😀
Delete